
Last updated November 17, 2026








Free written scope consultation - allowances, timeline, and change-order rules on paper before a single trade is scheduled
Kitchen Remodeling Troubleshooting: Common Problems and How to Fix Them
Grout cracking at the base of your new cabinets within six months isn’t a grout problem. It’s almost always a substrate problem the installer skipped over, and knowing that difference is the difference between a free warranty fix and paying a second crew to redo the same work. In our experience across Sunrise Manor remodels, the problems that surface after the crew leaves were knowable during the project. They just weren’t caught, because nobody had a written scope clear enough to flag them in time. This guide teaches you to identify the five most common post-install failures, document them properly, and resolve them without a screaming match.
Quick Answer
Most kitchen remodel problems after completion trace back to one of five causes: cabinet doors drifting out of alignment, grout cracking from a skipped substrate layer, countertop seams separating from thermal movement, an exhaust fan that can’t handle the cooking load, and outlet placement that looked right on paper but isn’t where you actually work. Each has a specific root cause, a specific fix, and a clear way to tell whether it’s a warranty defect or normal settling. Document it in writing, reference your guarantee, and give the contractor a fair chance to return before you escalate.
Styles & brands we work with
- Kitchen remodeling
- Bathroom remodeling
- Home additions & ADU
- Roofing
- Windows & doors
- Driveway & pavers
- Fence
Table of Contents
- Why Cabinet Doors Drift Out of Alignment
- Grout Cracking and the Substrate You Can’t See
- Countertop Seam Separation
- Exhaust Fan Inadequacy
- Outlet Placement Regret
- How to Flag a Problem Mid-Project
- How a Written Guarantee Changes Your Leverage
- The Final Walkthrough Punch-List Template
Why Cabinet Doors Drift Out of Alignment
Cabinet doors that suddenly rub, gap, or sit uneven usually aren’t warped. They’re shifting because the hinges have settled, the cabinet box was racked slightly out of square during install, or the humidity swing moved the wood frame. In Sunrise Manor, where summer indoor humidity can drop into the teens with the AC running and rise sharply in monsoon season, wood cabinets expand and contract more than homeowners in coastal markets expect. That swing is enough to pull a hinge out of adjustment within a season.
Here’s how to sort out which it is:
- Check the gap first. Open both doors and look at the reveal (the gap between them). Even gaps usually mean hinge adjustment. A tapered gap means the box is out of square.
- Test the hinge screws. A screw that turns easily under light pressure has stripped the pilot hole. That’s an install issue, not settling.
- Watch for seasonal change. If the doors close cleanly in October but stick in July, it’s wood movement, not a defect. Adjustment solves it; a full reinstall doesn’t.
- Document the gap width and location with a photo and a tape measure in frame. Warranty claims move faster with specifics.
Adjusting European concealed hinges takes a screwdriver and about thirty seconds per door. A door that’s been misaligned since install is a different conversation. If your cabinet line is a KraftMaid or Wellborn product, both carry manufacturer warranty on hinges and boxes alongside any workmanship guarantee from the installer, so the layers stack in your favor. Call (844) 972-4834 to schedule an estimate if you’re weighing a reinstall.
Grout Cracking and the Substrate You Can’t See
Grout that cracks along a cabinet base or backsplash seam within the first year is telling you something about what’s underneath. Tile needs a stable surface to sit on, and that surface is the substrate (the layer between your tile and the framing). For a kitchen floor, that’s usually a cement board or an uncoupling membrane. For a backsplash, it’s drywall or cement board depending on the tile weight. When an installer sets tile directly over plywood, or skips the membrane over a plank subfloor, the floor flexes underfoot and the grout gives at the seams first.
Here’s the diagnosis:
- Cracks along a straight seam or perimeter: almost always movement. The substrate is flexing or the tile was set tight to a wall without a movement joint.
- Cracks radiating from a corner or a single point: usually a hard impact or a hollow tile. Tap the tile with a screwdriver handle; a hollow sound means it’s already loose.
- Hairline cracks scattered across a floor: often a grout mix issue, too much water or a fast cure. Those are cosmetic and re-groutable.
- Milky or powdery grout that won’t harden: wrong mix or expired product. Warranty item.
The fix depends on the cause. Hairline cracks get raked out, cleaned, and re-grouted. Structural cracks need the loose tile pulled and the substrate corrected, which is real work and belongs on a written change order with a price on it. In Sunrise Manor’s dry climate, we see grout fail faster when it’s mixed too wet to speed up a hot-day install, so ask your contractor what mix ratio they used on the original job. If it’s not documented, that’s a flag.
Countertop Seam Separation
A visible line opening at the seam between two quartz slabs isn’t a material failure. Cambria, Silestone, and Caesarstone all hold their dimensions across temperature swings. What separates is the adhesive, and the reason is almost always one of three things: the seam was set over an unsupported span in the cabinet run, the installer used too little color-matched epoxy, or the slab was allowed to shift during cure. Quartz moves about a millimeter per meter over a fifteen-degree temperature change; a seam set right handles that. A seam set over a gap in the cabinet run doesn’t.
What to check before you call anyone:
- Run a straightedge across the seam. If one side sits higher, the slab has shifted and the seam needs re-splitting and re-gluing.
- Look under the countertop. Open the cabinet doors below the seam and check that a cabinet panel spans the joint. No support equals a warranty conversation.
- Check for chipping at the edge. Chipped edges mean the seam was ground aggressively during install and the finish is compromised.
- Note the location and width of the gap. A seam under a half millimeter is usually stable; over a millimeter is moving.
Re-gluing a seam is a skilled task that needs the right epoxy and clamps, and getting it wrong leaves a visible haze in the quartz. This is work for the original fabricator, not a handyman. Call (844) 972-4834 for a free estimate before you let a second company touch a manufacturer warranty.
Exhaust Fan Inadequacy
If your kitchen smells like last night’s fish at noon, or the range hood barely moves a tissue, the fan is underpowered for the cooking you actually do. The rule of thumb is simple: a fan should move 100 CFM (cubic feet per minute) for every 10,000 BTUs of burner output, plus 100 CFM for every foot of duct run over the first three. A typical gas range at 40,000 BTUs needs a fan moving at least 400 CFM at the hood, and in Sunrise Manor’s hot, dusty summers, a recirculating fan that just filters and blows back into the room is a losing proposition. Grease and moisture have nowhere to go.
The fix is usually one of three moves:
- Upgrade the fan, keep the duct. A 400 – 600 CFM hood over the same four-inch duct may still bottleneck. Check the duct diameter first.
- Upsize the duct to six or eight inches and run it straight out the wall or roof with as few elbows as possible.
- Switch from recirculating to vented. This is the highest-impact change and the one most often skipped in budget remodels.
Measure your hood width against your range width; a hood should overhang the range by three inches on each side to catch steam. If your remodel dropped a standard 30-inch hood over a 36-inch range, that’s a specification error, and a written scope would have caught it before install. Call (844) 972-4834 to price a corrected vent run.
Outlet Placement Regret
The outlet you can’t reach behind the toaster, the one that sits exactly where the backsplash tile pattern breaks, or the missing outlet where you actually stand to chop: all three are the same problem, planned from a floor plan instead of a lifestyle. The National Electrical Code requires countertop receptacle spacing no more than 24 inches apart along the wall, with no point on a countertop more than 24 inches from an outlet. That’s the minimum. What you need is a count based on where appliances actually live.
When you’re troubleshooting after the job is done, here’s the order of moves:
- Map the real appliances. Walk your counter and mark where the coffee maker, air fryer, mixer, and phone charger sit. Count outlets you can reach without moving anything.
- Check for GFCI protection. Every countertop outlet in Sunrise Manor and across Nevada must be GFCI-protected. Test each one monthly with the test button.
- Ask about a pop-up or under-cabinet outlet if the wall is finished and adding a box means cutting tile. It’s cheaper than re-tiling a backsplash.
- Get a written price before anyone opens a wall. Electrical work runs higher when the wall is finished than when it’s open.
Retrofitting an outlet into a finished backsplash costs more than planning it in, and it’s a good reason to have a written electrical scope before you sign. If you’re planning a redo, our Kitchen Remodeling in Sunrise Manor page covers the planning phase in detail. Call (844) 972-4834 for a free estimate.
How to Flag a Problem Mid-Project
Most post-completion problems are visible while the crew is still on site. The reason they don’t get fixed is that homeowners wait until the final walkthrough, when the crew has packed up and the fix becomes a scheduled return visit. If you see cabinet doors that don’t line up, tile that sounds hollow, or a seam you can catch a fingernail in, say so the same day, in writing, with a photo. Contractors can correct in-progress work in minutes that becomes a two-week callback after the truck leaves.
A simple mid-project procedure:
- Walk the room every evening. Note anything that looks off on a phone notepad with a photo and a timestamp.
- Send one email or text per day, grouped. Don’t drip items one at a time; batch them so the lead can plan a single correction pass.
- Ask for a corrected timeline in writing. “Door realignment by Thursday” is a written commitment you can hold.
- Keep the punch list separate from mid-project flags. Mid-project items should be closed before the crew leaves; punch-list items get solved at the end.
On any remodeling project we run in Sunrise Manor, we ask homeowners to flag mid-project issues the same day, because it’s cheaper for us and faster for them. Call (844) 972-4834 if you’re mid-remodel and want a written second opinion on an item.
How a Written Guarantee Changes Your Leverage
A verbal promise is worth nothing six months after the crew leaves. A written guarantee is enforceable. When something fails, the homeowner’s leverage comes down to three questions: what does the guarantee say is covered, what’s the time window, and what happens if the contractor doesn’t return. The Penhallow Remodeling Sunrise Manor standard is a 365-Day Done Right Promise on every project, in writing: if the work fails inside that year, we come back and fix it at no charge, and if a repair fails, the return visit is free of charge too. That’s leverage in plain terms.
When you file a warranty claim, put this in writing:
- The original scope line item the failure ties back to, quoted exactly as written.
- The date of install and the date of failure, both specific.
- A photo with the tape measure in frame so the size is measurable, not debatable.
- The outcome you want: repair, replace, or a written explanation why it isn’t covered.
- A response deadline, usually ten business days for a callback and thirty for scheduled work.
This is where a written price from day one pays off. Every number in the original scope is the number on the invoice, so there’s no argument about whether the fix was “included.” If you’re looking for a contractor who puts the guarantee in writing before the first cabinet is pulled, see our General Contractor in Sunrise Manor page and call (844) 972-4834 for a free estimate.
The Final Walkthrough Punch-List Template
Before you release final payment, walk the kitchen with a clipboard and document every unresolved item. A written punch list turns “we’ll get to it” into a dated commitment. Here’s the template we hand every homeowner at final walkthrough:
- Item number and location. “Kitchen, north wall, cabinet above sink.”
- Description of the defect. “Door gap 5mm at top, hinge loose.”
- Photo reference. “Photo 14, timestamped.”
- Cause assessment (yours). “Settling” or “install error” or “unknown.”
- Resolution requested. “Adjust hinge, rehang door.”
- Responsible party and date promised. “Penhallow team, by March 14.”
- Sign-off initials from both homeowner and lead. Both sign so nothing is disputed later.
Don’t release final payment until every punch-list line has a written resolution or, in rare cases, a written credit. A small holdback against unresolved items is normal and negotiated in advance, not invented at the walkthrough. If a contractor pressures you to sign off and release payment before the punch list is closed, that’s the moment to slow down.
Common Mistakes to Avoid
- Accepting a verbal scope. If the line items aren’t on paper, the fix becomes a debate. Sunrise Manor homeowners burned by ballooning budgets almost always had a verbal original.
- Filling the punch list at final walkthrough only. You should be logging items every day the crew is on site, not only at the end.
- Confusing settling with defects. Wood cabinets move with the seasons. A door that closes cleanly in fall but rubs in summer is settling; a door that never closed right is a defect. Know which one you have before you call.
- Hiring a second crew before asking the first to return. That voids most workmanship warranties. Give the original contractor the written chance to fix it first.
- Paying in full before the punch list is closed. A fair holdback against open items is normal. Releasing full payment before the list is resolved removes all leverage.
- Skipping the CFM math on the range hood. A 30-inch hood over a 36-inch range looks fine and vents poorly for the life of the kitchen. Sunrise Manor’s hot summers make it worse.
- Not photographing pre-existing damage. If something was already chipped before the crew came in, document it, or it gets charged to you.
See the difference
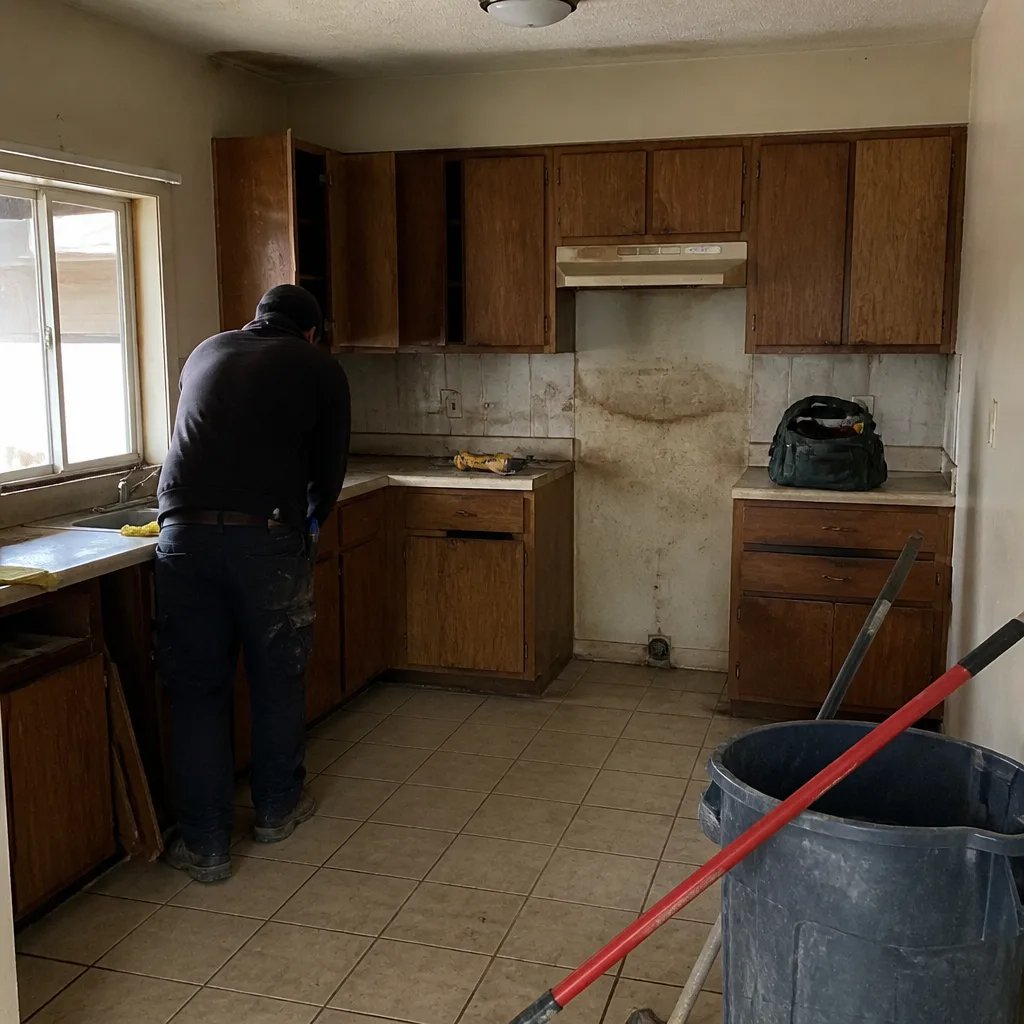 Before
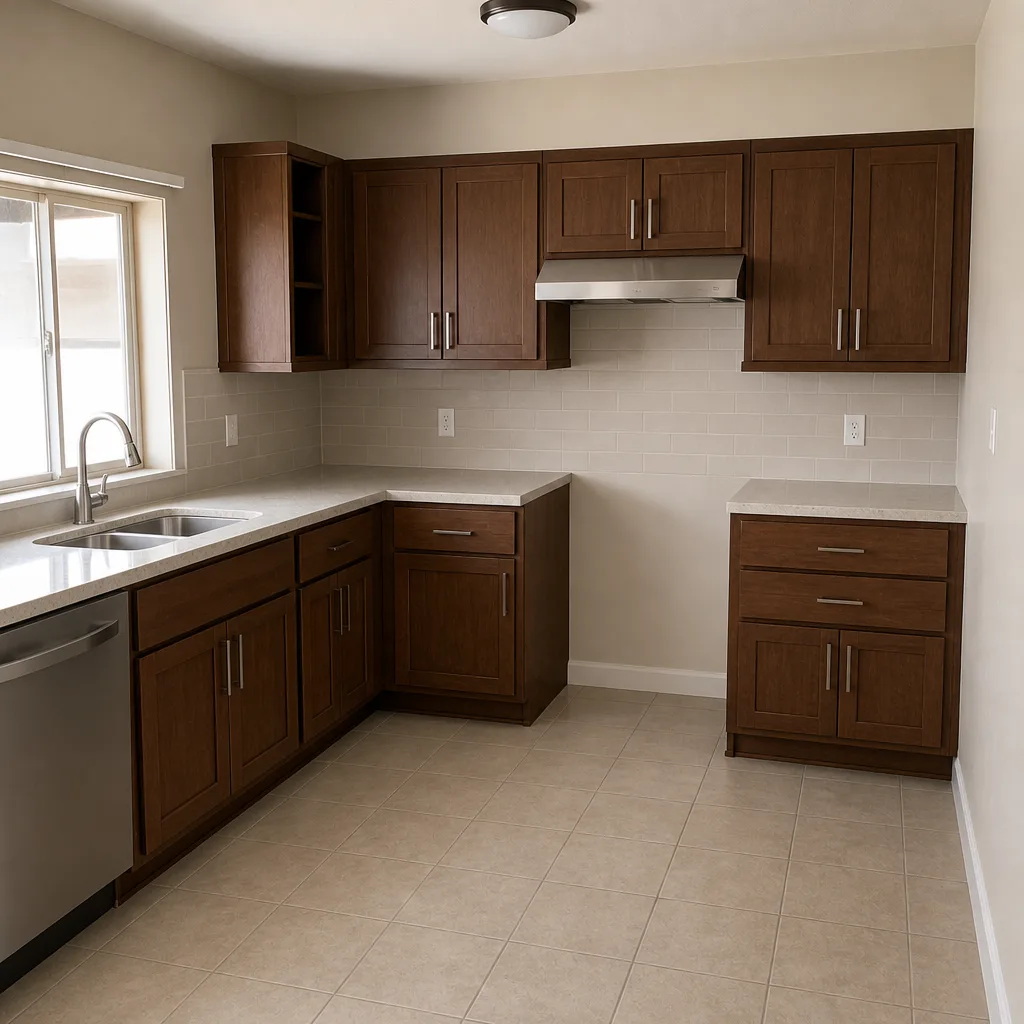 After
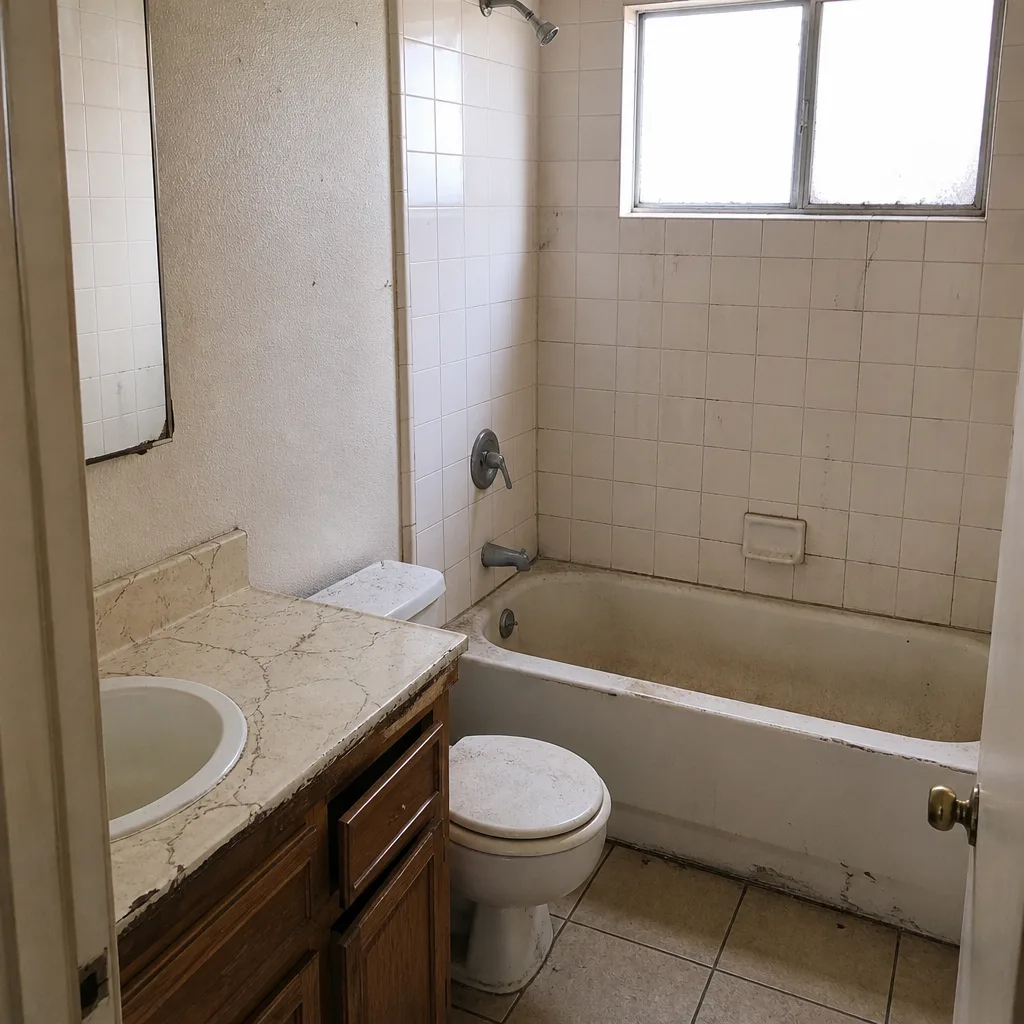 Before
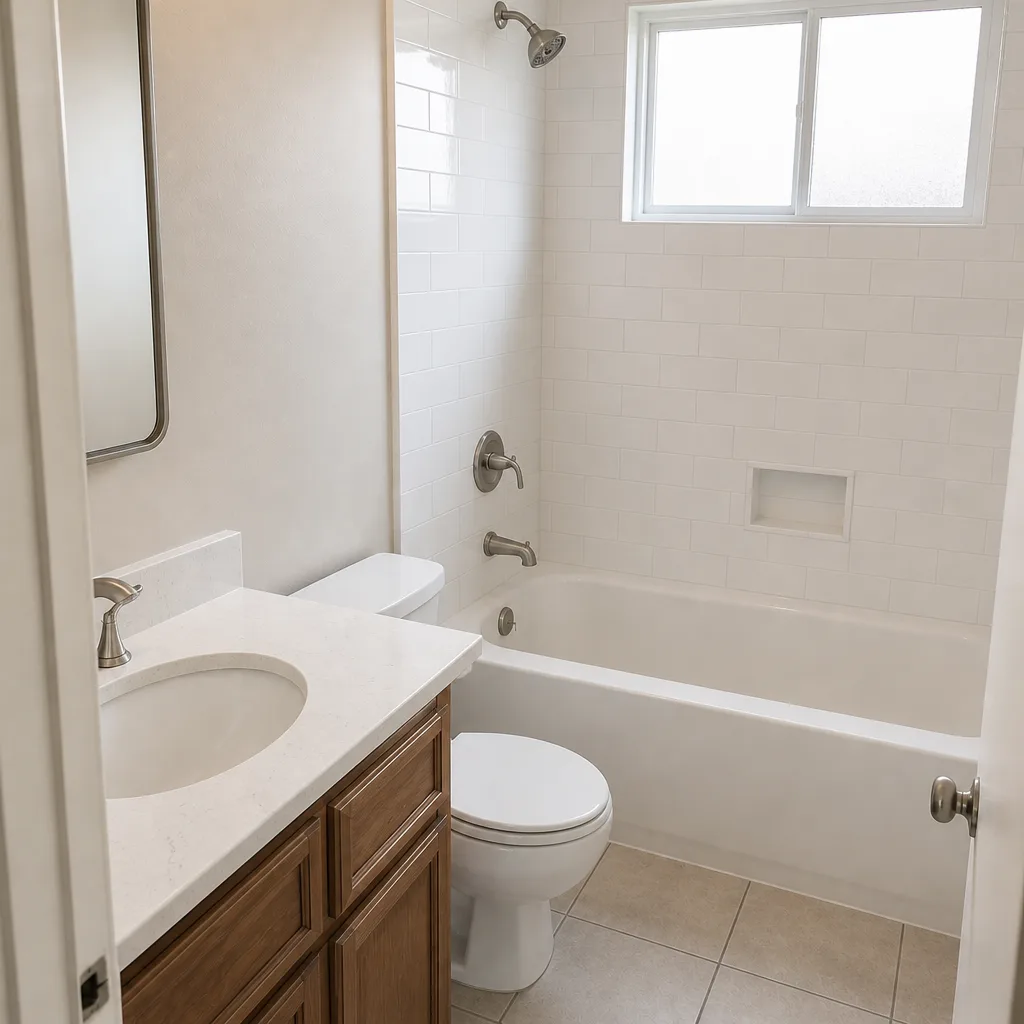 After
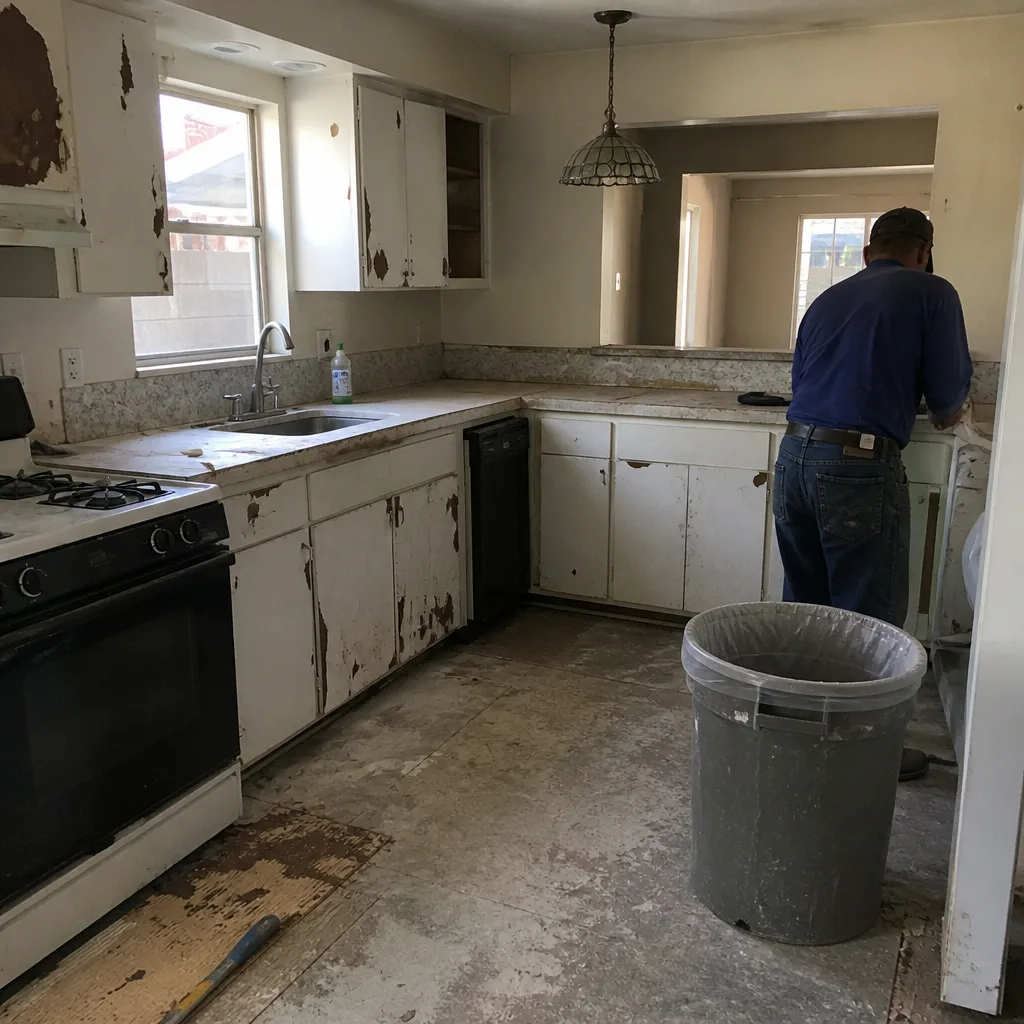 Before
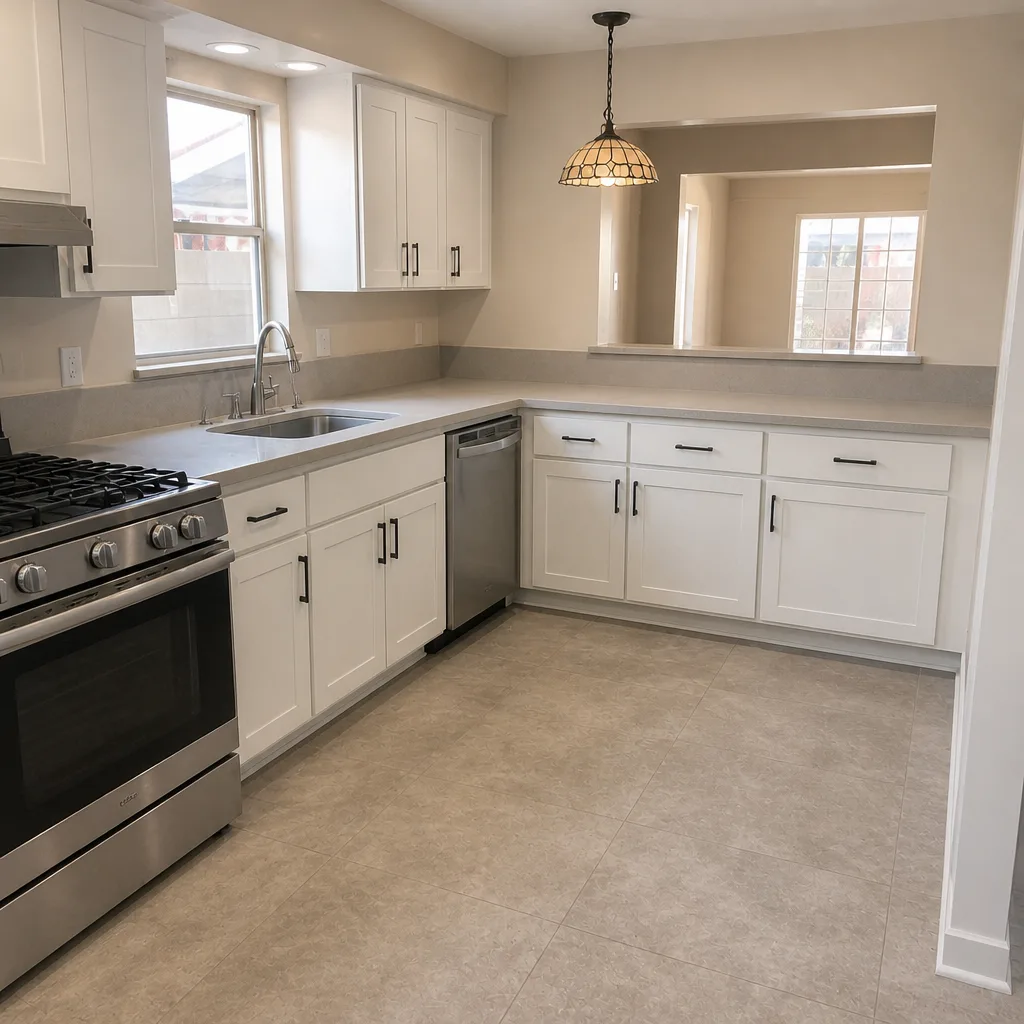 After
When to Call a Professional
Call a pro for any of the following: a countertop seam over a millimeter wide that’s still moving after a re-glue attempt, grout cracks that come back after a re-grout (that’s substrate, not grout), a range hood that can’t clear smoke from a single pan, cabinet boxes that are out of square along a whole run, or any electrical outlet relocation in a finished wall. These are the items where a second attempt by the wrong person costs more than the first get-it-right. A licensed professional handles the substrate correction, electrical work, and quartz re-seaming in one pass. Penhallow Remodeling Sunrise Manor offers free estimates in Sunrise Manor, and every job comes with a written price and the 365-Day Done Right Promise. Call (844) 972-4834 for a free estimate.
Frequently Asked Questions

Typical fixes run $150 – $450 for hinge or grout rework, $300 – $800 to re-seam a quartz countertop, and $900 – $2,500 to add a proper vented range hood or run a new vent. If the fix is a warranty defect on a Penhallow job, it’s covered under the 365-Day Done Right Promise and costs you nothing. Call (844) 972-4834 for an exact quote – estimates are free.
It shouldn’t, and on a written scope it can’t. The point of a written price before work starts is that the number on day one is the number on the invoice. If a crew discovers something hidden behind the wall, they owe you a written change order with a new price you approve before they touch it. Call (844) 972-4834 to schedule a free estimate with a written line-item quote.
Yes. Kitchen remodeling that involves moving electrical, plumbing, or gas lines requires permits from Clark County, and inspections are the homeowner’s protection. Every Penhallow project is run permit-first, with inspections passed before final payment. If a contractor offers to skip the permit, walk away. Call (844) 972-4834 to talk through permit scope for your project.
A meaningful workmanship warranty runs at least a year. Penhallow’s 365-Day Done Right Promise covers every job for twelve months, in writing, with a free return visit if a repair fails inside the window. Beyond that, product warranties from manufacturers like KraftMaid, Wellborn, Cambria, and Moen stack on top. Call (844) 972-4834 for details on how the coverage applies to your project.
Sometimes. Hairline cracks from grout mix or fast cure are cosmetic and usually covered. Cracks along a seam or perimeter that come back after re-grouting mean the substrate is the problem, and that’s a workmanship defect that falls squarely under a written guarantee. Document the crack with a photo and tape measure, then call (844) 972-4834 to schedule a free assessment.
Say it the same day, in writing, with a photo. Contractors can correct in-progress work in minutes that becomes a scheduled return visit after the truck leaves. Batch your items into a single daily email so the lead can plan one correction pass. Call (844) 972-4834 if you’re mid-remodel in Sunrise Manor and want a written second opinion.
The Bottom Line
Almost every post-remodel problem you’ll face traces back to a scope that wasn’t specific enough to catch it before the crew left. Cabinet drift and grout cracks come from substrate and settling; countertop seams and exhaust problems come from installation decisions; outlet regret comes from floor-plan thinking instead of lifestyle thinking. The fix on your end is the same in every case: document with photos and measurements, know whether you’re looking at a defect or normal movement, and hold the written guarantee accountable before you hire a second crew. That’s how a kitchen in Sunrise Manor stays a one-time cost instead of a do-over.
If you’re planning a kitchen, bath, or whole-home project and want a written price before anything starts, see our Penhallow Remodeling Sunrise Manor home, our Bathroom Remodeling in Sunrise Manor page, and our Kitchen Remodeling in Sunrise Manor guide. When you’re ready, call Penhallow Remodeling Sunrise Manor at (844) 972-4834 for a free estimate. A real person answers the phone 24/7, and every quote comes with a written price and the 365-Day Done Right Promise in writing.
Written by the team at Penhallow Remodeling Sunrise Manor.